Jun 26, 2011

Charring and Using Natural Materials with Flint and Steel...Part 2

In part one I charred some punk wood by lighting it and stopping the burning process by smothering it in an air tight tin. I also wanted to try charring material in a tin on the fire much like charcloth is done.

Some of the materials I had along was some Ceder bark, Cattail down and some of the punk wood. All three materials I placed in an Altoids tin on the coals for about three minutes or so, I took it off the coals when the gasses escaping out from under the closed lid would burn for about thirty seconds or so and allowed them to cool.


Ceder bark


Cattail
Punk wood


The finished product in the order above after cooling off.


I was able to strike and catch a spark in all three materials that I charred.While not quite as easy as catching a spark in charcloth it's not that difficult. The technique I used was to hold the steel stationary above the tin or fire box and strike down with the flint throwing the sparks downward into the charred material where it would catch and start to glow. I held my tinder (shredded Ceder bark) against the glowing material and blew on it until it caught and started to burn. Once lit I closed the lid saving it for future use.


Although I didn't try it you could take a piece of charred materiel and place it on the flint to catch a spark in the more traditional manner but I want to experiment more with this method to see if the firebox can be "fed" with small amounts of tinder to be self regenerating.

Stay safe
Bob

Jun 25, 2011

Charring and Using Natural Materials with Flint and Steel...Part 1

   Ever since watching these excellent videos on the subject I've been meaning to give this a try, fact of the matter is as mentioned in the videos you probably wouldn't cut up your clothing for use in flint and steel fire lighting if it could be helped and our ancestors had an acute awareness of the natural world and how to make fire as their very existence depended on it.
Field Preparation Of Plant Tinder For Use With Flint & Steel By Charring
No Charcloth Flint & Steel Fire Lighting
 
I made the trip to my fire pit down at the creek  taking along some natural materials and some tins to char them in. These materials I had on hand as I tend to gather and save tinder when I find it.

The first material I tried was some punk wood, I simply placed the material on the coals and once lit took it out and placed it in an air tight tin.

I removed the burning punk from the fire with some tongs made from a branch and placed them in a tin

After placing the burning punk in the tin I covered it and I allowed it to to cool before trying to throw a spark on it. After a couple of strikes it landed on a suitable spot and started to ember up.


Stay safe
Bob

Jun 10, 2011

Quick trip to the woods.

Between the farm weather and my job free time has been getting mighty scarce. Sunday we found some time to get to the woods plink with 22's and have some fun while getting a couple of Bushclass requirements done.

Made some char cloth with an Altoids tin, I did not put a hole in the lid after thinking there would be enough of an air gap around the lid and it seems to work.


It seemed to work well!


 Also we made some plain Bisquick bread or bannock.


The pot hook method did not work so well so I ended up putting it in the coals. All in all I was pretty happy with the outcome and made me wish we would have made some stew to go with it.


Enjoying the fruits of our labor.


Stay safe
Bob

May 9, 2011

Hike to an old Boy Scout camp

A nice Sunday with the sun shining and I'm heading to the mountains for a hike,to an old Boy Scout camp more specifically. In the late 70's I was part of Boy Scout Troop 125 and we built a camp in the mountains above Ft. McCord. We would stay up there for about a week during the Summer working on it and hunting Snipes.

The beginning of the Hike down from the top of the mountain.

On the way down you pass through a couple of landings from when it was logged off, each one had a couple of Dog Woods.


The somewhat rocky trail travels down through a gap through some old downed timber which I can remember being there when I was a kid.


The beginning of a mountain stream, fresh water coming out of the ground right on the trail.

Some outcroppings just before coming to an old dry quarry.


Some old equipment from the past right above the quarry


Not much further down the trail is the camp I helped build, the logs for the cabin were dragged down from where the trees were down by us wearing harnesses and pulling like mules. If I remember correctly it may have been built on an old charcoal site from the old iron industry in the area. Not bad for 30 some years old.

The fire pit where a lot of good times were spent.


This is where our patrol had our tent site cut out of the mountain side, the stone wall is still there, there were four sites all together as the Scout leaders slept in the cabin.

It was a great day out with a lot of memories and I can't help but wonder if the Indians passed through this same gap during the Indian wars, maybe Mary Jemison passed through here when she was a captive.

Stay safe
Bob

May 1, 2011

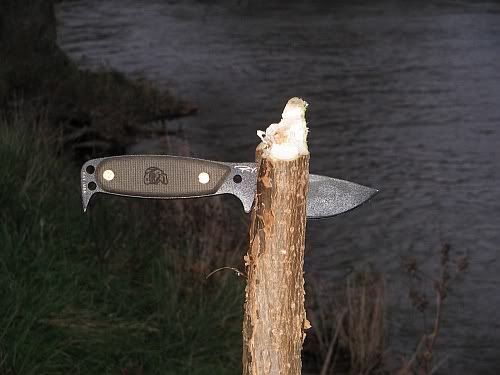
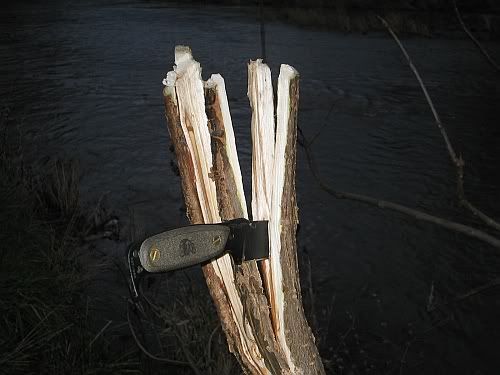
H.E.S.T. knife reveiw

This is a re post of a review I did several years ago on the RAT/ESEE Blade Forum during a pass around. While this knife is not everyones cup of tea, either because of the design or politics I found it to be quite useful during my review and in a trade finally acquired one.

Hostile Environment Survival Tool
This knife (H.E.S.T.) was designed by journalist Robert Young Pelton as a multifunction survival knife/tool and originally manufactured by Rowen and marketed through ESEE Knives. This knife has been discontinued by ESEE but will be manufactured by TOPS Knives for RYP's DPx Gear.


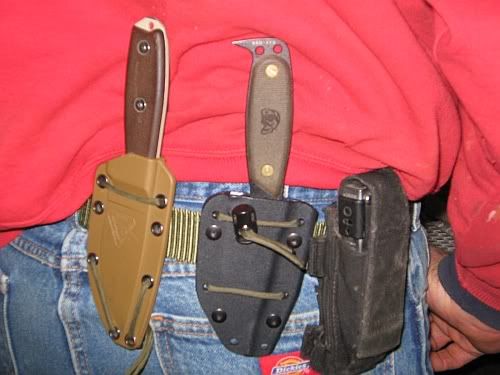
As soon as I got the HEST I was impressed how well it "locks" into my hand with the pry hook coming up against my pinky finger giving a very secure grip, the thumb ramp feels natural and compliments how well it feel's in the hand. It's a great looking knife and after all the use it has seen so far was non the worse for wear. The Kydex sheath holds the knife securely and looks great. Taking the handle slabs off the hollow is large enough to carry some survival gear which is a great feature, I found a mini firesteel I had and it fit's easily with room to spare.

The first thing I did was to ditch my RC-3 and Izula and carry the HEST with me as my only knife. As soon as I got it, it went in my front jeans pocket as I headed off to knee therapy before heading to work. It was small enough to disappear without much of a print which is important in "polite society", and didn't seem to bother me as I went though therapy on a cross trainer,leg press and treadmill and other exercises for the next hour.

Heading for work and changing into my work pants it fit all but the pry hook allowing me to retrieve it easily to cut cardboard and some plastic straps. I couldn't help my self when I saw an 8 ply cardboard shipping container about 3 inches thick and stabbing it through and the tip would come out the other side with both a forward and reverse grip, the grip when doing this seemed very secure as your hand feels "locked to the knife, it would also easily cut and stab through several layers of clothing from the rag bin at the plant. No photos were taken of this part due to no cameras allowed in the plant.

The next day at the farm I switched to belt wear as it's how I usually carry and found it just a little harder to re sheath the knife without looking but that was mainly due to muscle memory, I got used to it pretty quick and by the end I could readily get it re sheathed without looking. The handle location on my belt was not that much different than my RC-3 so it was easy to reach back and unsheathe it and I found the hook made it east to locate my hand on it.


The HEST lent itself very well to the daily farm chores cutting bale strings which isn't much of a challenge but that's normal farm life.

I also tried it cutting some rope both nylon and natural fiber, it took a little more effort to cut through the rope than my RC-3 but that was probably due to a thicker blade and edge geometry.

It would lend itself very well in and emergency, on occasion you can have livestock that is haltered go down and pull the rope tight making it nearly impossible to get them free other than cutting.

While getting to some hay bales one night in the rain I had to remove a fence insulator from a T post to roll them out to the other side, between the rain and cold fingers I couldn't get a grip on it, reaching back and pulling the Hest I found the pry hook to lend itself quite usefully in getting it off.

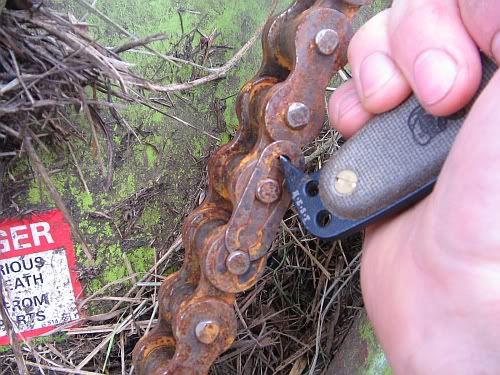
Now it's become a truly useful tool, this got me to thinking what else this pryhook might help accomplish
I used it to remove a master link from a chain on the baler, not really prying but using the hook to unclip it and clip it back on.

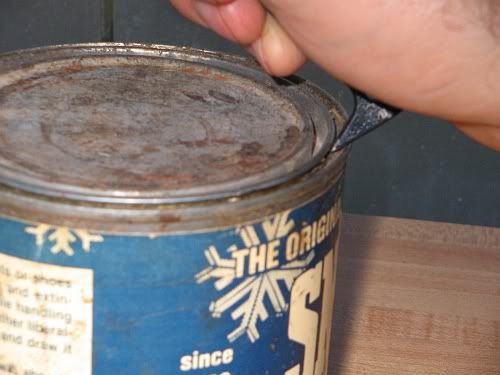
I also used it open a can of sno seal.


I find the pry hook to be an extremely useful feature as the knife can be used for prying and scraping without any possibility of damaging the edge, especially what I might use a knife for on the farm

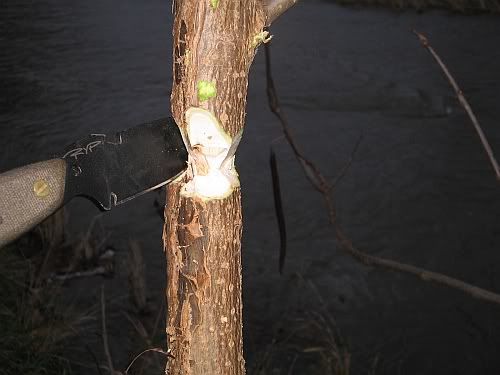
On occasion a branch will grow out into the pasture fence and will have to be removed and the HEST didn't let me down here either, it easily batoned off a small tree and split it any way I wanted.


I did try the wire breaker on some old electric fence wire and it worked as I expected.I didn't get to use the bottle opener and that seemed to be the least useful feature on the knife for what I would use it for but it didn't bother me being there.

In the short time I've got to use the HEST I've gotten to really like it,I've found it to be useful as both a knife and a tool and feels and handles as solid as a rock and is most definitely going to be on my short list., I really liked this knife and found it to be quite useful as an EDC.

Lord Robert Baden Powell founder of the Boy Scouts was asked once “What are
you preparing for?” and he replied “Be prepared for anything!”... In my opinion the HEST would be an excellent EDC blade to achieve this end.

I just want to say thanks to KSF for making this pass-around possible, And to RYP and RAT for such a great design.

Apr 3, 2011

Dakota Fire Hole

     I've been meaning to try the Dakota fire hole for quite sometime but just never got to it, but today was a good day for it so off I went to the woods. One explanation I've heard for this method of fire was that the Plains Indians used it to keep the fire low so as to avoid prairie fires due to the wind blowing the embers away, I don't know whether this is true or not but it does make sense me.
 
It's a rather a simple design as that the fire burns in a hole to keep the flames low and the air is supplied to the fuel by a draft vent to the bottom of the hole where the fire is burning. It can be dug with a digging stick and scooped out by hand in more primitive conditions but a trowel or small shovel makes the job easier. I took along a Cold Steel shovel and I dug my initial hole about a foot deep or so and probably about a foot in diameter.


The draft vent  was started a little over a foot away upwind of the fire hole, I drove a make shift digging stick in at about 45 degrees from there to the bottom of the fire hole.


Working the digging stick in the draft vent I got it to where it was about 2 inches in diameter to the bottom  where it enters the fire hole.


After completing the fire pit I moved on to fire prep, gathering branches from pencil lead sized twigs to branches slightly bigger than my thumbs. The materials I gathered were off the ground and fairly dry even though we have been having wet weather off and on recently. The prepped materials I kept off the ground by placing them on my shirt which I was working on due to the damp ground,  my shavings I placed on a "vine nest" so once the shavings were lit with a fire steel I could place them in the hole without it falling apart.


    Once lit it was a simple matter of placing the wood into the hole to feed it and keep it going.


For what it's worth standing back about twenty feet or so it's not very noticeable that there is even a fire there, although I could see a slight amount of smoke.


I gave boiling some water a shot in my French canteen cup by placing some green branches over the hole as a grate, I'm not sure how long it took as I didn't time it but it seemed to boil in a short amount of time.
I'm happy with this design of fire and how well it went, one could experiment with the size and depth of the hole and draft vent to suit various purposes. One thing I should mention, I have read that this fire shouldn't be used where the soil has a high organic content because of the chance of fire burning underground or catching roots on fire.

Stay Safe
Bob